Configuring Thunderbird
Once you have Thunderbird installed, open the program. If this is your first time using Thunderbird, you will be greeted with an account creation screen, which you can close.
1. Open the File Menu. This may not show by default on newer Thunderbird installations, but you can access it by pressing the "alt" key, or by right clicking anywhere in the top menu bar and selecting the "Menu Bar" checkbox. From the File Menu, select "New", then "Existing Mail Account".
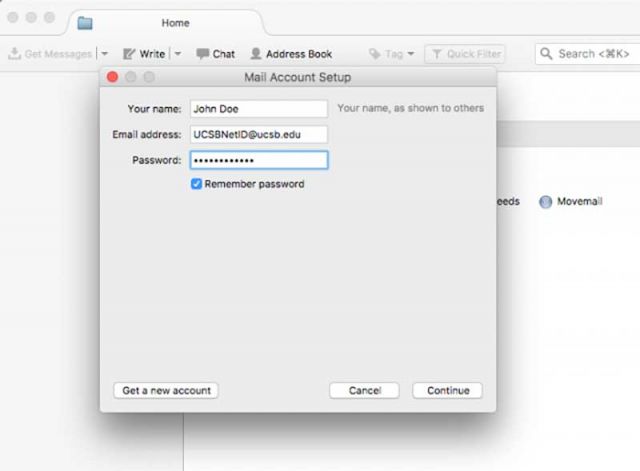
2. Fill in your name, your email address in the form of USCBNetID@ucsb.edu, and your password. Then click Continue.

3. Replace the automatic settings with those pictured below. You will likely need to edit the server hostname, port, and SSL fields, as well as the username. Then click Re-test.
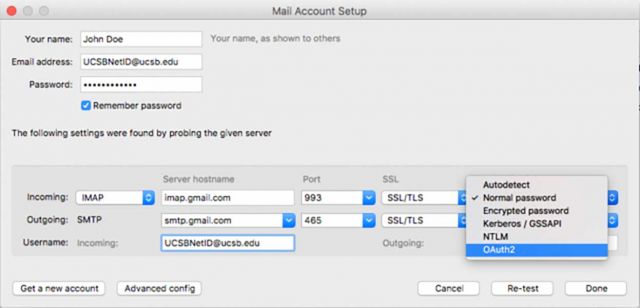
4. Once the test is complete, select OAuth2 from the drop-down Authentication menu for both incoming and outgoing. Then click Done.
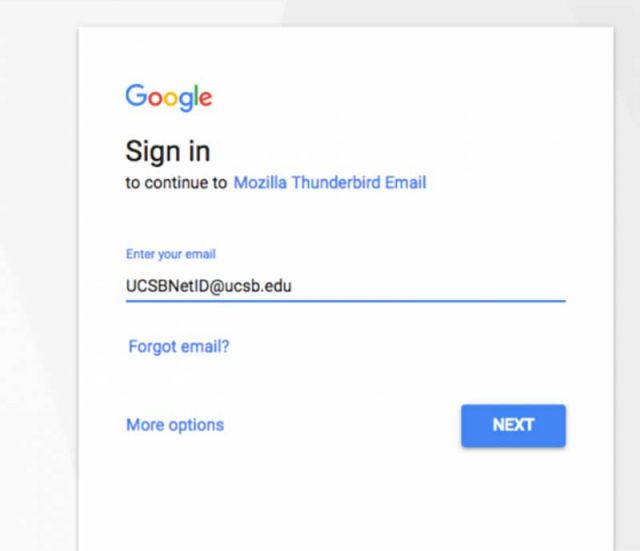
5. A Google pop-up will appear for authentication. Verify that your UCSBNetID@ucsb.edu email address is input as your email address, and click Next.

6. Enter your UCSBNetID password and click Next. If you have two-factor authentication enabled for your account, you will receive a notification at this point.

7. A permissions notification will appear. Click Allow to grant Thunderbird access to your account. At this point, restart Thunderbird to allow the changes to take effect.

8. From the Menu, click Tools and then Account Settings. Select the new @ucsb.edu account and enter your name in the "Your Name" field. Then, add your departmental (lifesci) email address for Account Name, Email Address and the Reply-to Address fields.

9. Select the Server Settings option on the left hand side, then change the option for "When I Delete A Message " to "Move it to this folder". From the drop-down box, select G-mail, then Trash (and Trash again, if necessary).
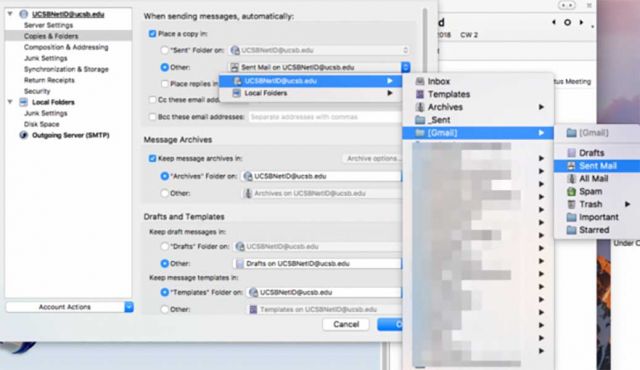
10. Select the Copies and Folders Option and change the When Sending Message option to Place a Copy In and "Other:", then select your Account Name - [Gmail] - Sent Mail folder.
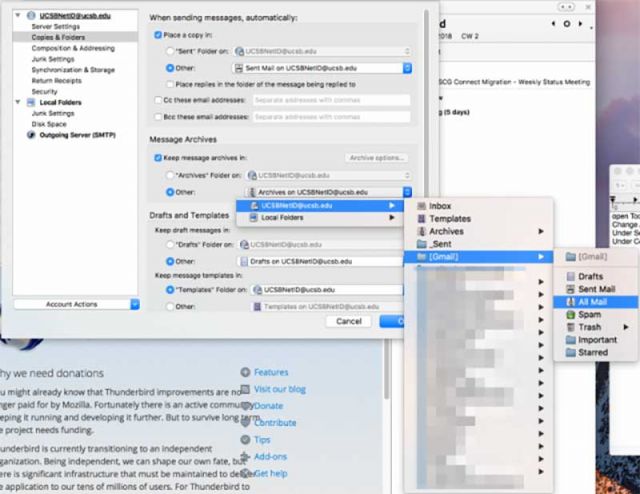
11. For Message Archives, select "Other:" and then navigate to your Account Name - [Gmail] - All Mail.
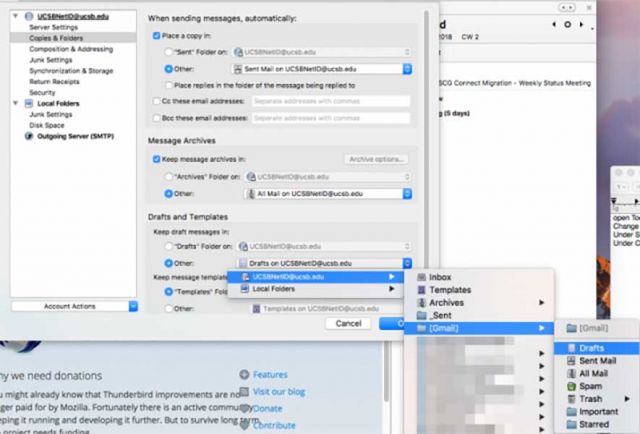
12. Again, for Keep draft messages in:, select "Other:", and navigate to your Account Name - [Gmail] - Drafts.
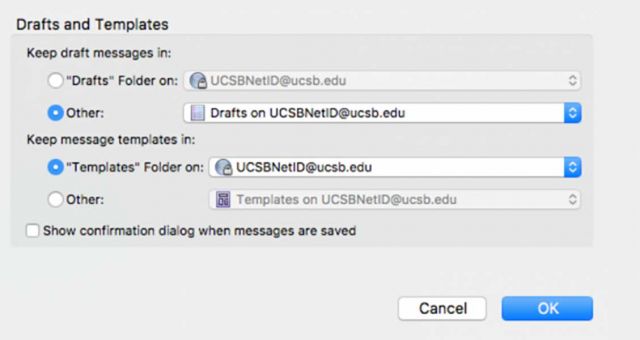
13. Finally, for Keep message templates in:, most users will select the Templates Folder on: option with the UCSBNetID@ucsb.edu option. However, if you have an existing Templates folder that you would like to select, you can choose it from the "Other:" drop down box at this time.
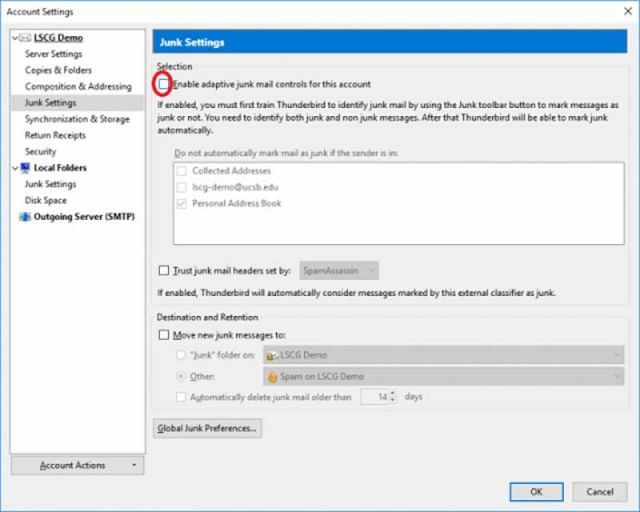
14. Click on Junk Settings in the panel on the left, and un-check the Enable adaptive junk mail controls for this account setting. Your basic mail configuration is now complete, though you may wish to configure a signature at this time.