Connecting to a Network File Share or NAS Drive (Mac)
This tutorial will show you how to connect to a file share or NAS drive on a Mac.
Before you get started, you'll need the following:
- Your ADS/CHEM-ADS information
- The hostname/IP of the NAS drive and the folder(s) you'll need access to (network address)
- If you're remote, make sure you're connected to Pulse Secure.
- If you're on campus, make sure you're connected to the building network and not eduroam
Let's begin.
Step 1
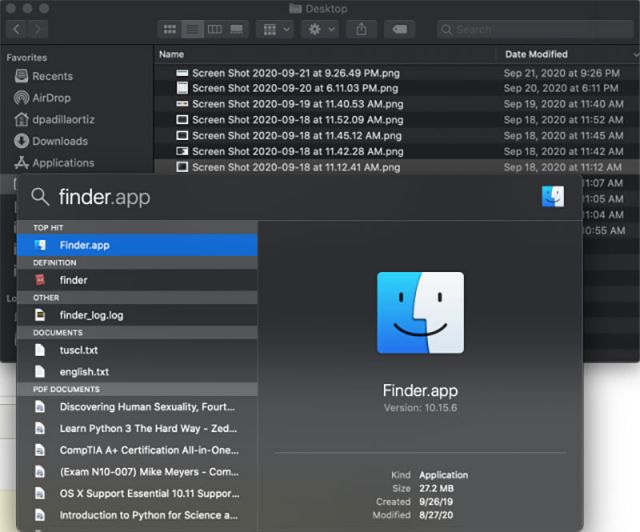
Open the Finder app either by either (a) finding it on your task bar or (b) through Spotlight by pressing the "Space Bar" and "Command" buttons at the same time and typing "Finder". Then press Enter.
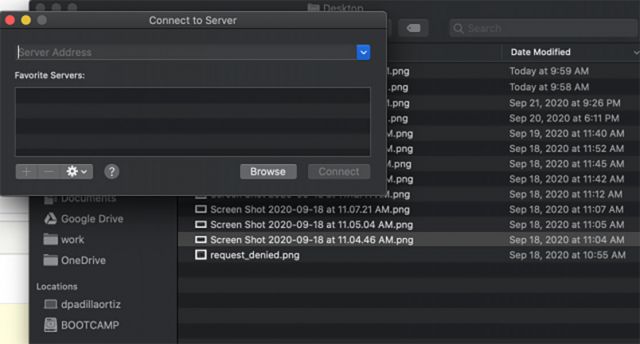
2. Then press buttons "Command" and "K" at the same time to bring up the Connect to Server window
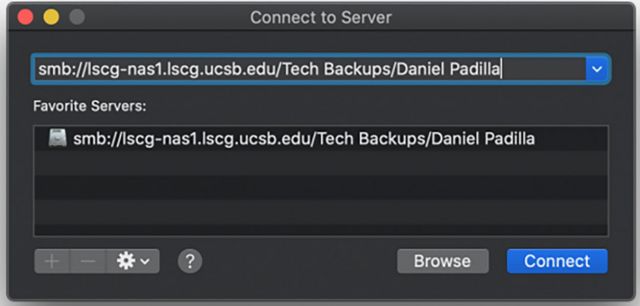
3. In the Server Address bar, type in "smb://nasdrivehostname/shared/folder". For quick access, press the + button to add it to your Favorite Servers.
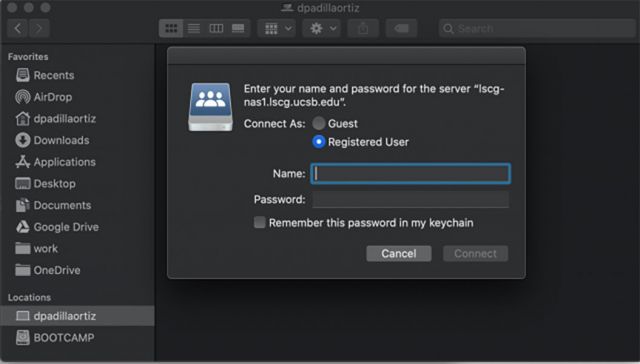
4. Then select Registered User and type in user your name as ads\username or chem-ads\username and your password. Click Connect.
Generally, if you are in the Life Sciences Buildings and Noble offices, you will be adding ads\ before your username and if you're in PSBN/Chemistry building then you'll add chem-ads\ before your username.
5. Three different things can happen depending on the network address you've entered.
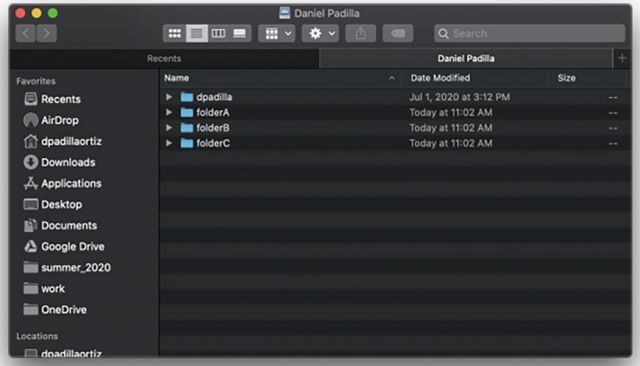
a. You were successfully able to mount the shared folder to your Mac. Skip to step 8 if you'd like to automatically connect to the NAS drive, otherwise congrats you're done!
b. You've been asked to select the volumes (folders) to want to mount. Continue with step 6.
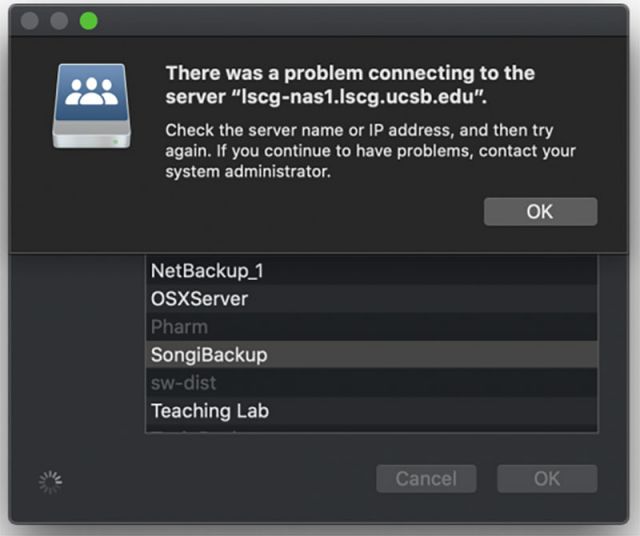
c. You've encountered the following error. Contact LSCG and CC your lab manager to confirm that you need access to the desired shared folder. Repeat step 4 after you've received confirmation that you have access to the folder.
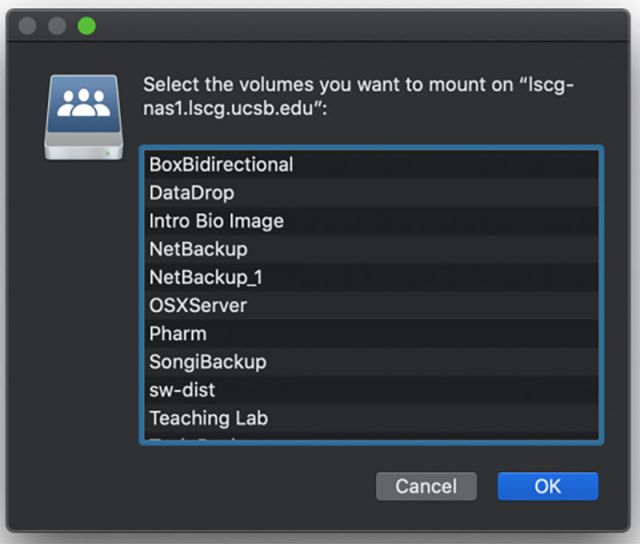
6. Select the folder(s) you would like access to. To select multiple folders at a time, hold Command and click on each folder. Then click OK.
7. If you have permission to access the selected folders, then you should have been taken to the network folder like in the image in Step 5a.
If you encountered an error like in step 5c, then contact LSCG and CC your lab manager to confirm that you need access to the desired shared folder. Repeat step 4.
8. Now let's configure a setting so that you'll automatically connect to your network folders when you log into your computer.
Note: The following steps are optional.
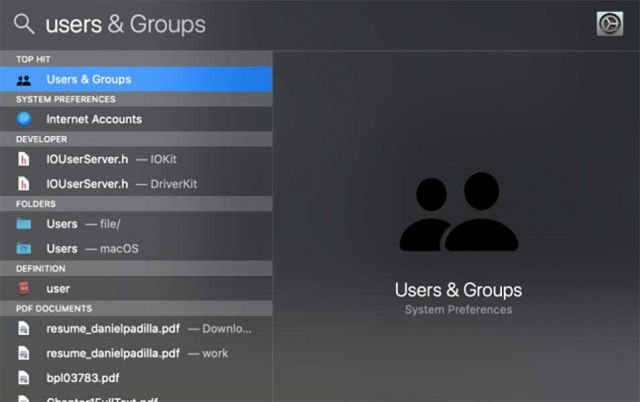
9. Press the Space Bar and Command buttons to pull up Spotlight and type "Users". Click on Users & Groups.
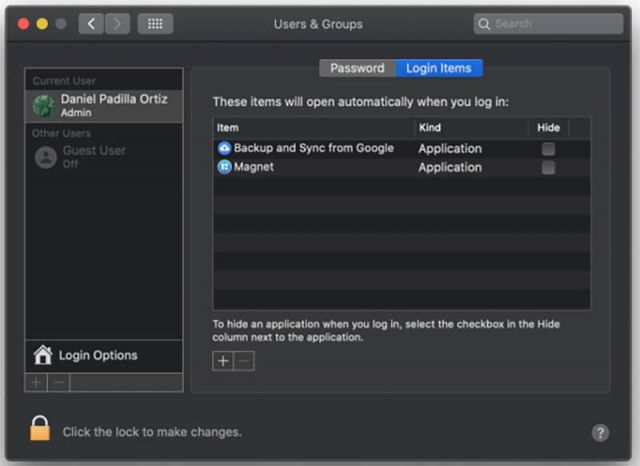
10. Click on Login Items located on the top next to Password (What you see in your Login Items list may vary). Then click the + icon under the "To hide an ... to the application" text.
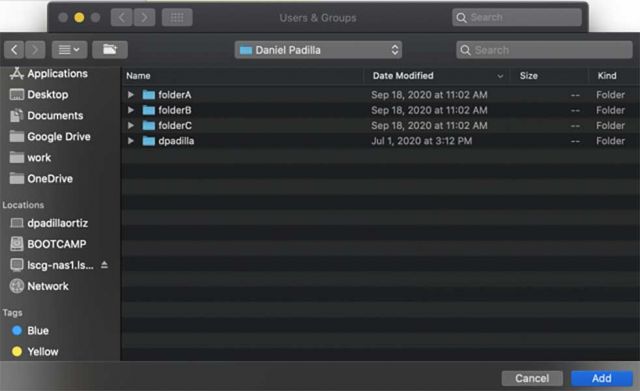
11. On the left side bar, scroll down to Locations to find your network folder. Then click on the folder and find the folder(s) that you need access to; to select multiple folders at a time, hold Command and click on each folder. Click Add.
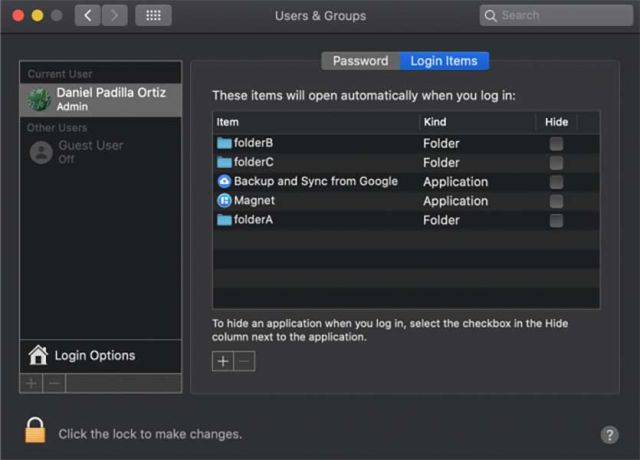
12. You should now see the folder(s) you selected on the Login Items list. Close the window.
Congratulations, you've successfully added your network file share to your Mac. If you got stuck on any step, contact LSCG and we'll be more than happy to assist you.