Creating a Print Queue (Windows)
Be sure to download and extract/install the latest printer driver from the manufacturer's website.
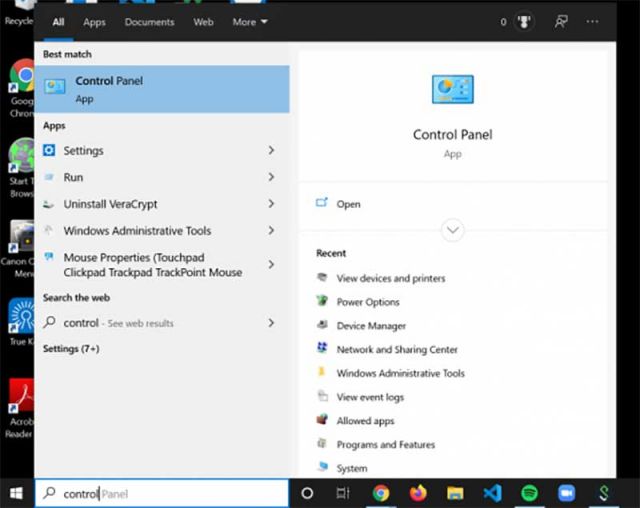
1. Click the Windows Start button, then search and select "Control Panel".
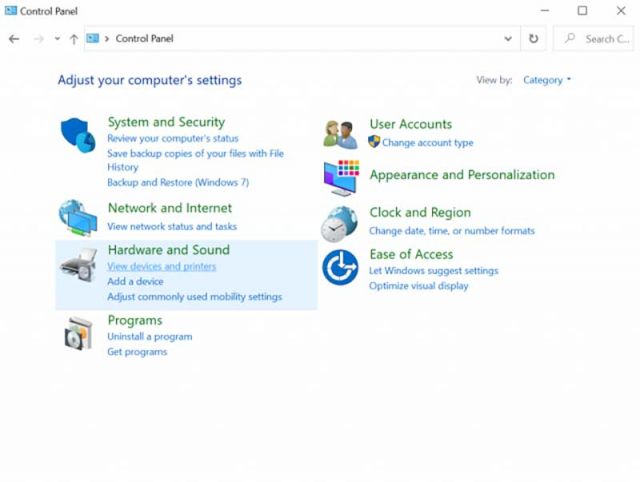
2. Click on "View device and printers" under the heading "Hardware and Sound".
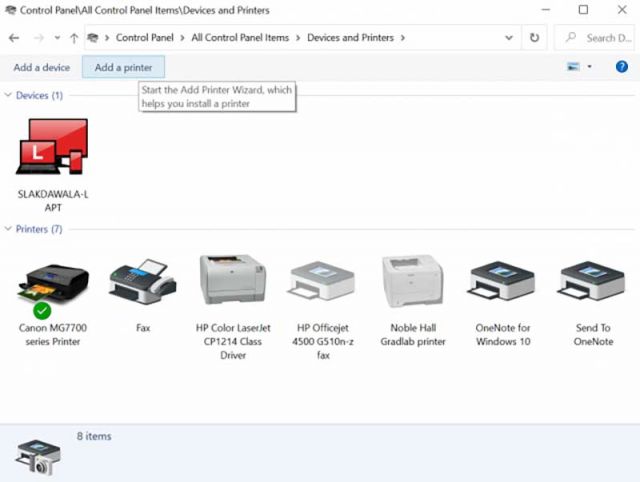
3. Click the "Add a printer" button at the top of the window.
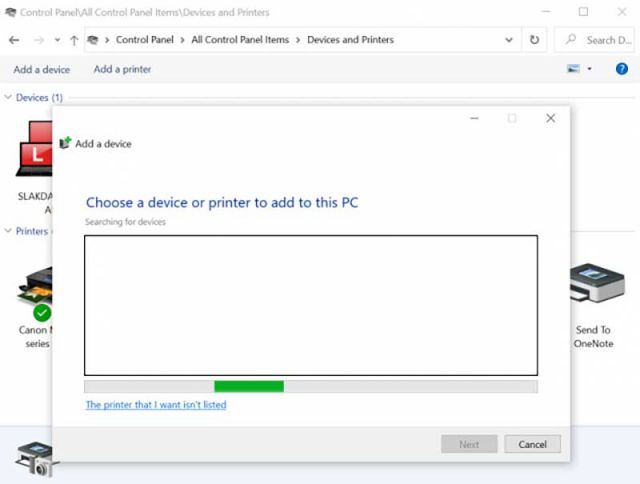
4. Click "The printer I want isn't listed".
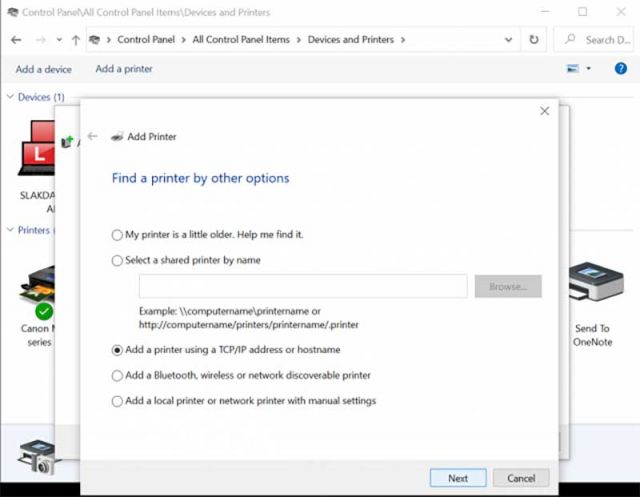
5. Click "Add printer using TCP/IP address or hostname".
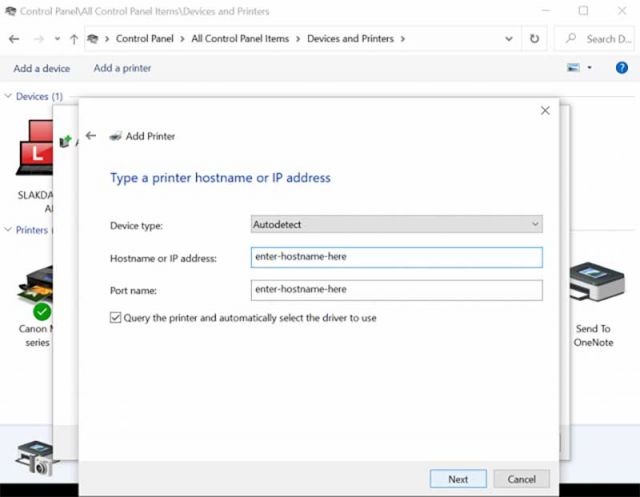
6. Enter the hostname for the printer (same in both fields) and check the "Query the printer" option.
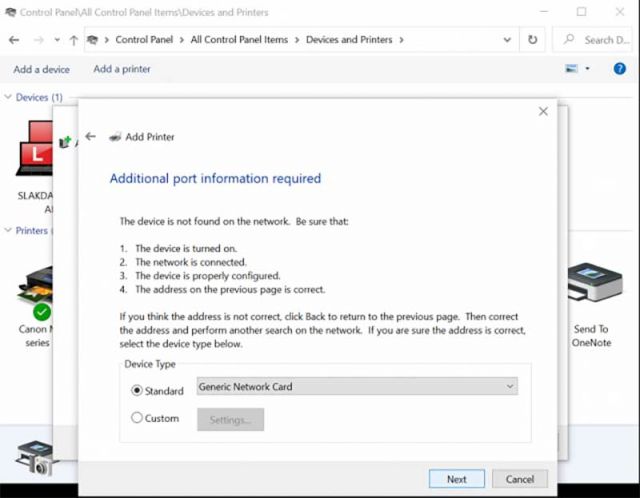
7. IF YOU SEE THIS WINDOW: Leave the page as is and click "Next." IF NOT: Skip to Step 9.
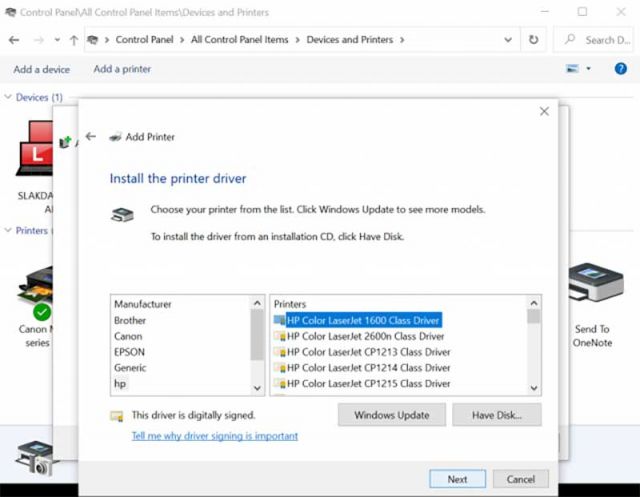
8. IF YOU SEE THIS WINDOW: Select the printer model and click "Next." If the model is missing, click "Windows Update," wait a few minutes, then check again.

9. Enter the hostname for the printer in the "Printer name" field.
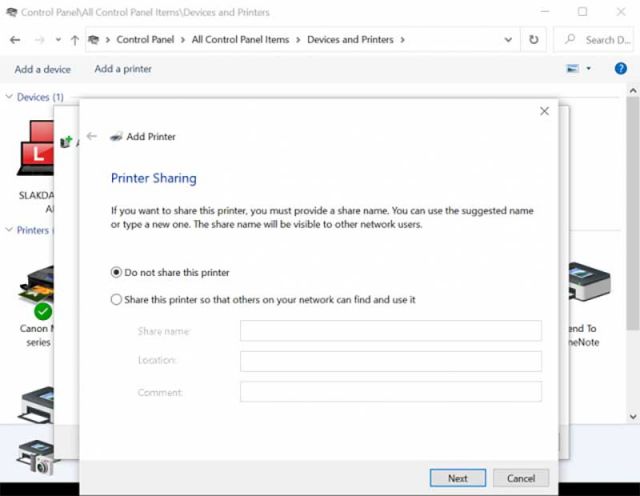
10. Verify the "Do not share this printer" bubble is marked.
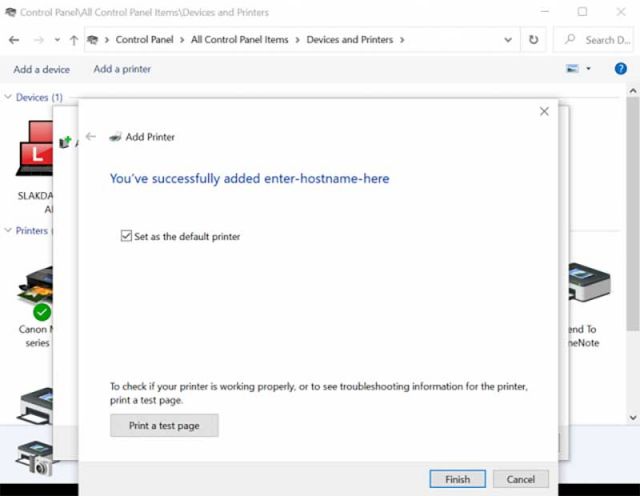
11. If this printer will be your primary printer, check the "Set printer as default printer" option. Click "Finish".